In the previous post, we decided to build a ‘WordPress Blueprint’ modular house on the land called ‘AWS Lightsail’. We also finalized the ‘$7 plan (supporting IPv4)’ for stable connectivity.
This article dives straight into practice without complex theoretical explanations. Even if you are new to the AWS console, you can launch your blog within 10 minutes by following the screenshots.
1. Action: Creating an Instance
Log in to the AWS Lightsail Console (lightsail.aws.amazon.com). (If you don’t have an account, please sign up first.)
1-1. Select Platform and Blueprint
Click the Create instance button in the center of the main screen. Select the specs as decided in the previous post.
- Platform: Select Linux/Unix.
- Blueprint: Select the WordPress icon under the
Apps + OStab.
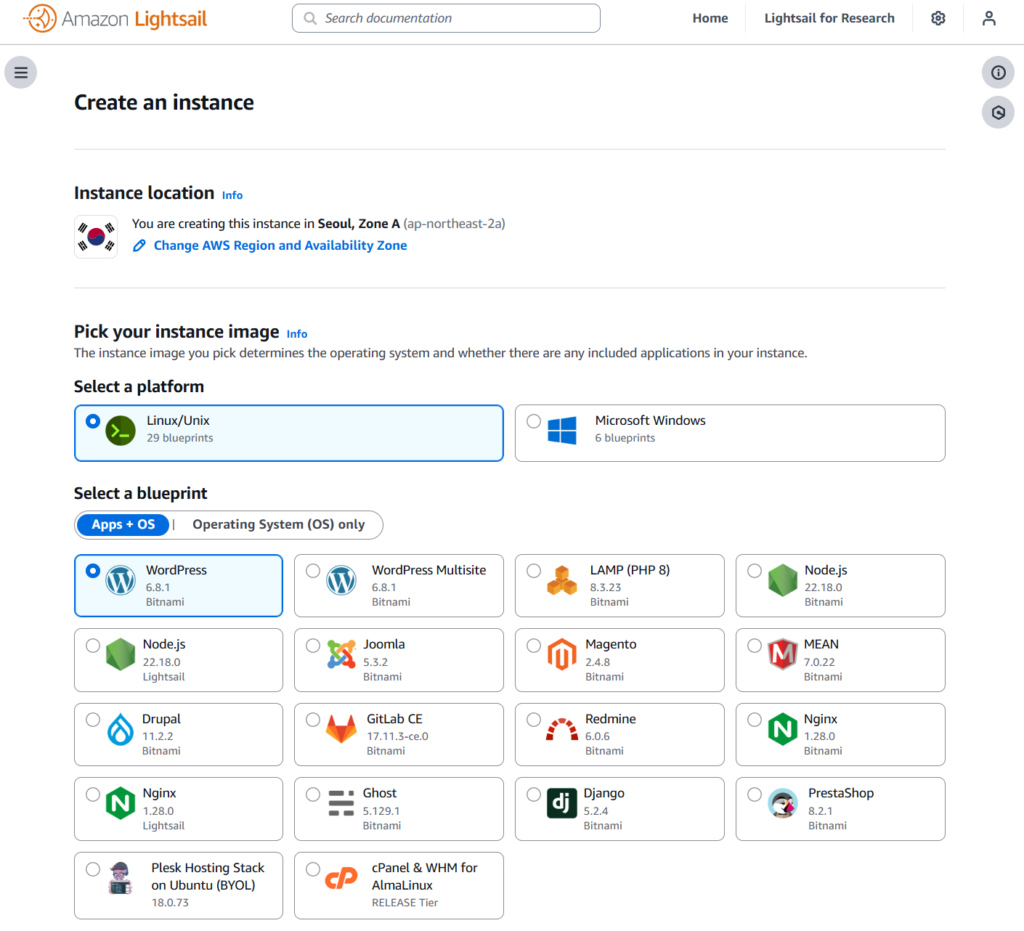
- Note (SSH Key Pair): You might see an
OPTIONALsection orChange SSH key pairsetting below. This is for setting up the server key, but it is set to default automatically, so you can leave it as is.
1-2. Select Instance Plan
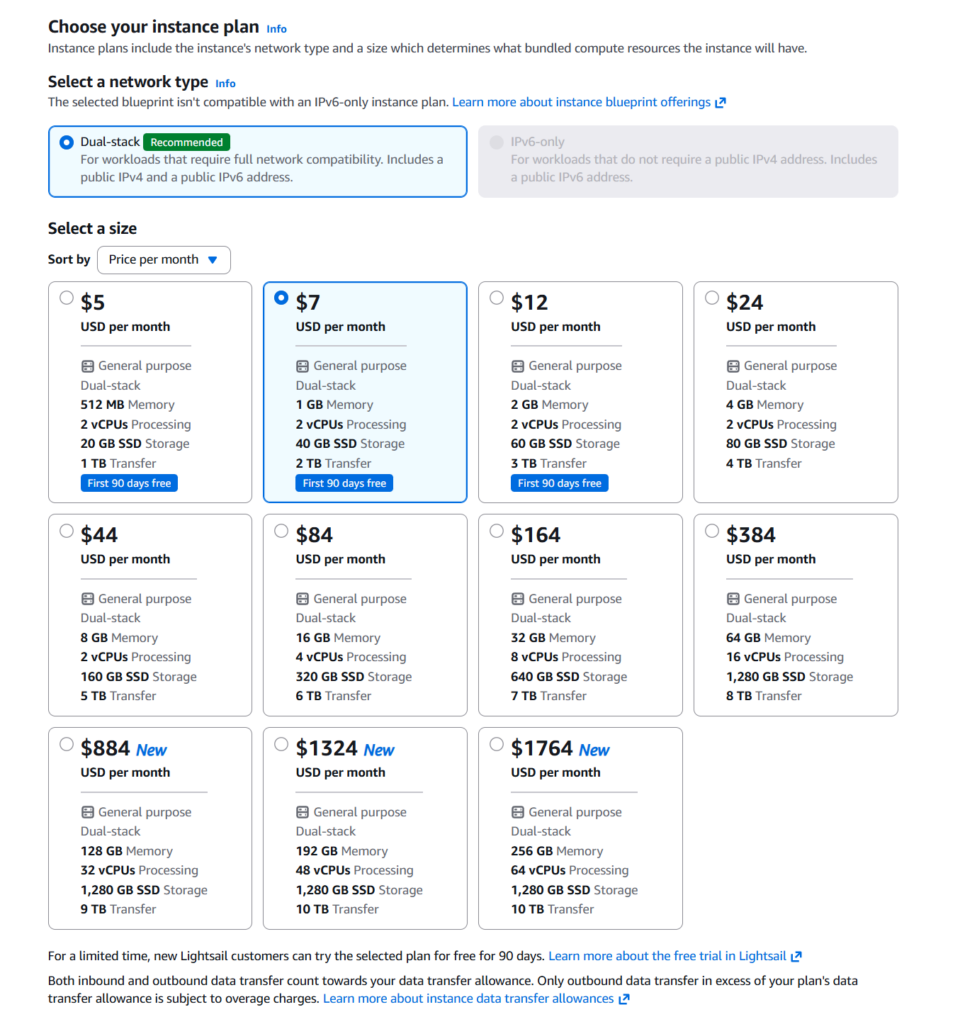
Scroll down to select your plan. Be careful as AWS might have a more expensive plan selected by default.
- Networking type: Ensure
Dual-stack(IPv4 & IPv6) is selected. - Instance plan: Click the $7 USD/month (Memory 1GB) option.
- Tip: Check for the ‘First 3 months free’ badge.
1-3. Finalize Instance Creation
- Identify your instance: Enter a name for your instance (e.g.,
wordpress-blog). - Click the Create instance button at the bottom.
Return to the dashboard and wait a moment for the instance status to change from Pending to Running. Your server is now live!
2. Action: Attach a Static IP (Mandatory)
To prevent your IP address from changing every time you restart the instance, you must attach a ‘Static IP’. This step is not optional; it is mandatory.
- Click the name of the instance you just created on the dashboard to enter the details page.
- Click the Networking tab in the top menu.
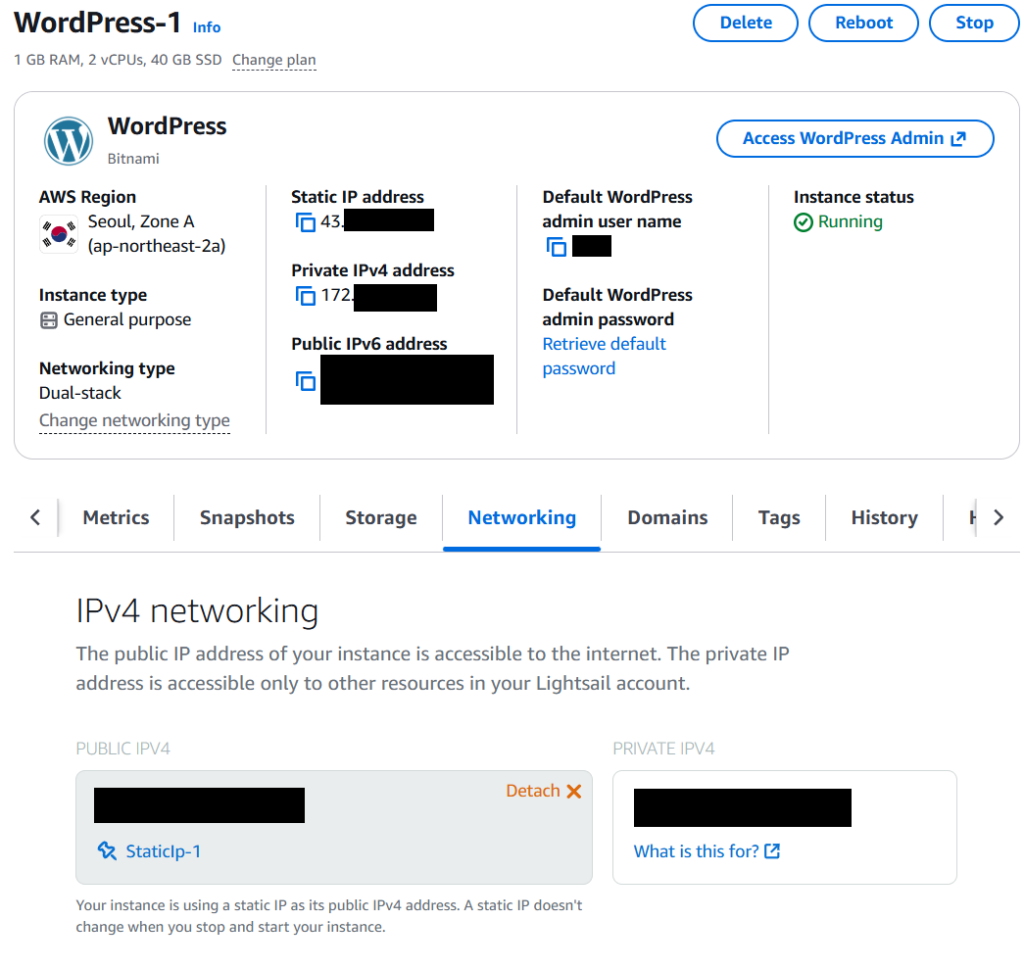
- Click the Create static IP button.
- Name your static IP (default is fine) and click Create.
Your blog now has a permanent, unique address (e.g., 43.xxx.xxx.xxx).
3. Action: Check Admin Password & Login
Try entering the static IP address you just received into your browser’s address bar. If you see the basic blog screen with Hello world!, you have succeeded. Now, let’s enter admin mode to start writing.
3-1. Retrieve Password (SSH)
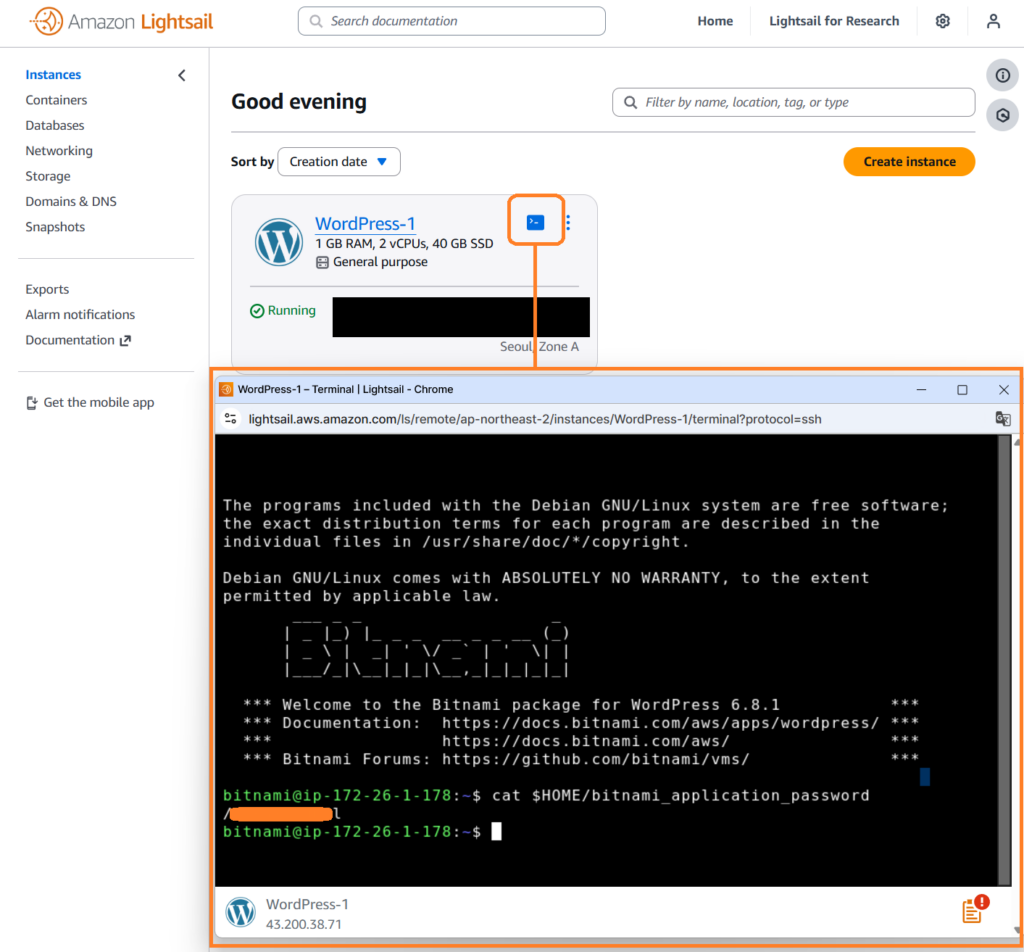
The WordPress admin password is hidden inside the server for security. You need to open the terminal to check it.
- From the Lightsail instance list, click the orange square icon (terminal shape).
- When the black terminal window appears, copy and paste the command below and press Enter.
cat $HOME/bitnami_application_password
- The complex string displayed on the screen is your initial password. Drag and copy it.
3-2. Admin Login
- Enter
http://YOUR_STATIC_IP/wp-adminin your browser address bar. - When the login screen appears, enter the following information:
- Username:
user - Password: (The password you just copied)
- Username:
If the login is successful, you will see the WordPress Dashboard. Congratulations! You have successfully built your own home.
4. Troubleshooting: Common Issues
Q. Will I be charged for the Static IP?
It is free while attached to an instance. However, if you delete the instance and leave the static IP alone, you will be charged. When closing your blog later, you must delete (Release) the static IP as well.
Q. The SSH window closes immediately.
This might be due to firewall issues at your company or cafe. Try using smartphone tethering (hotspot) or try again from home.
Conclusion
You have now established your own independent space on the AWS cloud. You no longer need to worry about service termination notices from blog platforms.
However, your address bar currently shows a bleak number (IP) and displays a ‘Not Secure’ warning. In the next post, we will purchase a domain to give your blog a proper name and set up SSL (HTTPS) for security.