[Intro] The House is Sturdy but Empty Inside
We have come a long way. We bought the land (Lightsail), hung the doorplate (Domain), and put on a sturdy lock (SSL). Now it is time to open the front door with excitement and step inside the house.
However, the scenery of my house (WordPress) that I just entered is quite desolate. There is no basic furniture, the wallpaper is crude, and a builder’s sticker called ‘Bitnami’ is stuck in the corner.
This post is about the ‘moving-in cleaning’ and ‘basic interior’ process performed before unpacking in earnest. Let’s clear away the annoying things for a pleasant writing environment and proceed with essential settings to build the blog’s basic stamina one by one.
[Concept Note] Dashboard and Plugins
The WordPress admin screen is like the ‘Control Room’ of the house. Here we perform two key tasks.
- Theme = Interior Style Decides wallpaper color, flooring, and furniture arrangement. Fancy and heavy themes make the house look narrow (slow down speed). As developers, we will pursue a simple and fast minimalism style.
- Plugin = Home Appliances It is the process of bringing in appliances like air purifiers (SEO tools), CCTV (backup tools), and dishwashers (code highlighters) into an empty house. If you install too many, the electricity bill (server resources) will be high, so you must carefully select only the necessary ones.
[Action 1] Setting Basic Rules (General & Permalinks)
First of all, we need to set the ‘house rules’. Access the admin page (domain/wp-admin) and log in.
- Time and Language Settings Go to Settings > General menu.
- Site Title/Tagline: Write the blog name and a one-line introduction.
- Timezone: Change to ‘Asia/Seoul’ or ‘UTC+9’. If you don’t do this, the post publication time will be messed up.
- Membership: Uncheck ‘Anyone can register’. This is to prevent spam registration.
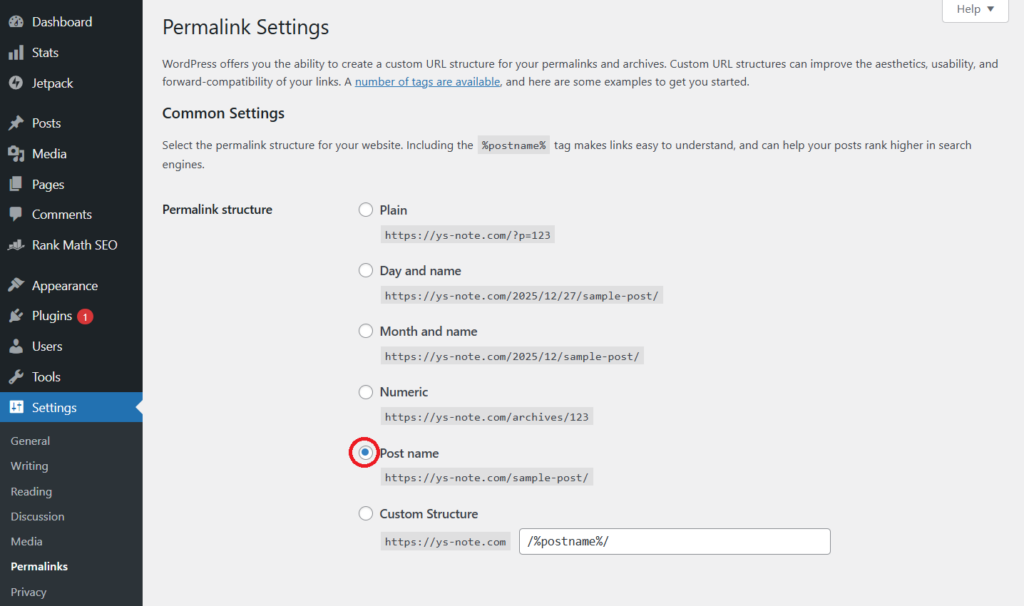
- Permalink Settings (Important) Go to Settings > Permalinks menu. This is the most important setting in SEO (Search Engine Optimization). The default value is a meaningless number like ‘/?p=123’. Google bots hate these addresses.
- Select ‘Post name’.
- The address changes intuitively like ‘/my-first-post/’, which is much more advantageous for search exposure.
[Action 2] Interior Construction (Theme Installation)
The virtues of a developer blog are ‘readability’ and ‘speed’. Paid themes with fancy animations are actually poison.
GeneratePress (Free Version) It is one of the most acclaimed themes worldwide for speed and optimization. It is light and customization is free.
- Click Appearance > Themes.
- Click the ‘Add New’ button.
- Search for ‘GeneratePress’ and install & activate.
Now the blog should look much neater.
[Action 3] Moving in Essential Appliances (Plugin Installation)
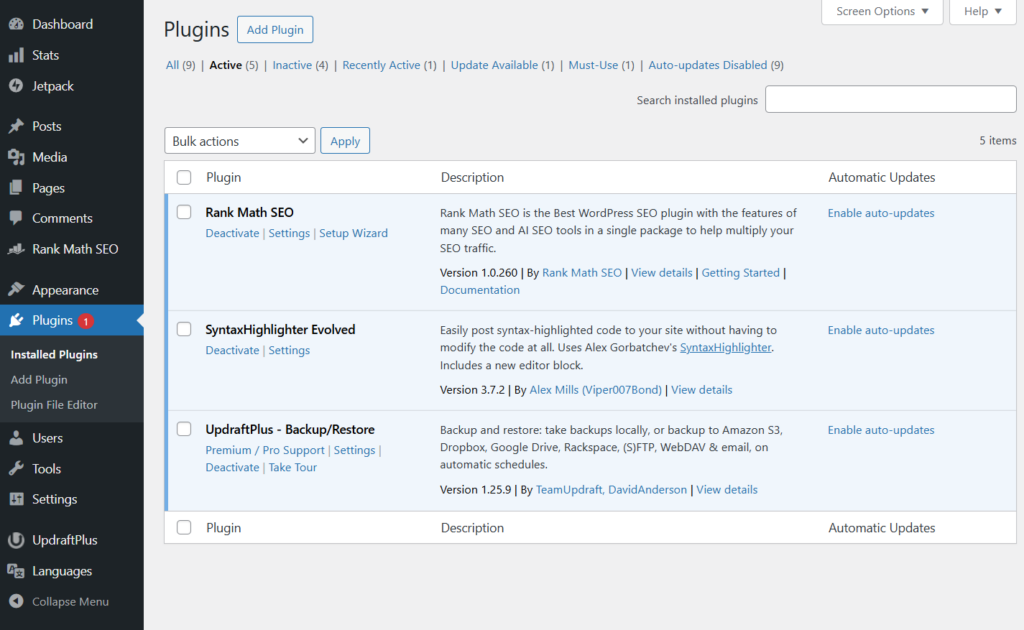
Install the three captain plugins indispensable for developer blog operation. Search and install from the Plugins > Add New menu.
- Yoast SEO (or Rank Math) It is an assistant that checks if the format is liked by Google every time you write a post. It helps generate meta tags and sitemaps.
- Syntax Highlighter Evolved (or Highlight.js) We are people who handle code. It is a tool that provides syntax highlighting colorfully when source code is inserted into the body. The readability makes a world of difference.
- UpdraftPlus It is insurance. It automatically backs up data to Google Drive or Dropbox in case the server blows up or gets hacked.
[Action 4] Removing Builder Sticker (Bitnami Banner)
The logo ‘Manage’ (Bitnami banner) always follows the bottom right of the WordPress site made with Lightsail. It covers the screen on mobile and is very annoying. Let’s remove it via SSH connection.
- Connect via SSH Terminal Open the terminal from the Lightsail console.
- Enter Removal Command Enter the following two lines in order. These commands disable the banner and restart the Apache server.
sudo touch /opt/bitnami/apache2/conf/bitnami/bitnami-disable-banner
sudo /opt/bitnami/ctlscript.sh restart apache
Now if you refresh the site, the annoying banner should be gone.
[Troubleshooting] Cleaning Finish
Q. Sample posts remain. Let’s boldly delete the default ‘Hello World’ post and ‘Sample Page’. Empty the trash to make it clean.
Q. Is a Privacy Policy page necessary? To get Google AdSense approval later, a ‘Privacy Policy’ page is essential. Refine the draft that WordPress created by default and turn it to ‘Publish’ status.
[Conclusion] Ready to Write
Now our house is cleanly cleaned, and necessary furniture has found its place.
- Organized the address system (Permalinks)
- Applied clean wallpaper (GeneratePress)
- Installed security and convenience devices (Plugins)
- Removed the annoying sticker (Banner)
Now all that remains is to fill this space with your story. In the next post, we will cover how to use Markdown, which is useful for developers when writing posts, or how to register the site with Google Search Console to invite search engines.