The Moment It Becomes ‘My Server’, Everything Is My Responsibility
Last time, I crossed the wall of the Linux CLI and permissions. chmod, chown, and the absolute no-no chmod 777. I had a decent grasp of access control for individual files.
But at that point, I was under a big illusion. I thought that as long as I managed ‘file permissions’ well, my server was safe.
“Server security? Isn’t that the security team’s job?”
For a large company, maybe. But I’m a solo developer. Server admin, security officer, network engineer — it was all ‘me’. Every responsibility for security was on my shoulders.
And what made me realize that was the server access log I found one Monday morning.

The Crisis: Someone Was Knocking on My Server’s Door
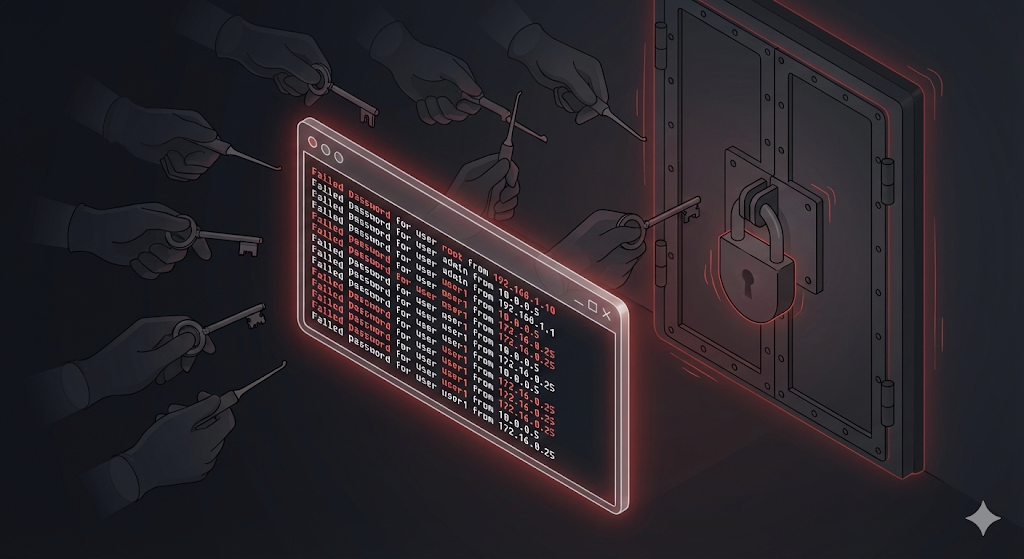
Monday morning, I SSH’d into the server out of habit to check the logs, and I found something strange.
# Check recent SSH login failure records
$ grep "Failed password" /var/log/auth.log | tail -20
The logs that came up on screen gave me goosebumps.
Feb 10 03:14:22 sshd: Failed password for root from 185.220.xx.xx
Feb 10 03:14:25 sshd: Failed password for root from 185.220.xx.xx
Feb 10 03:14:27 sshd: Failed password for admin from 185.220.xx.xx
Feb 10 03:14:30 sshd: Failed password for ubuntu from 185.220.xx.xx
...
Hundreds of login attempts starting at 3 AM. The IP was overseas. The account names were rotating through root, admin, and ubuntu. Someone was running an ‘automated program (bot)’ to brute-force my password.
“Wait… I haven’t been hacked yet, right…?”
Luckily, they didn’t get through. But can you really say “I’m fine because they didn’t break in” when a burglar is right at your door trying every key one by one? I immediately started auditing my server’s security posture.
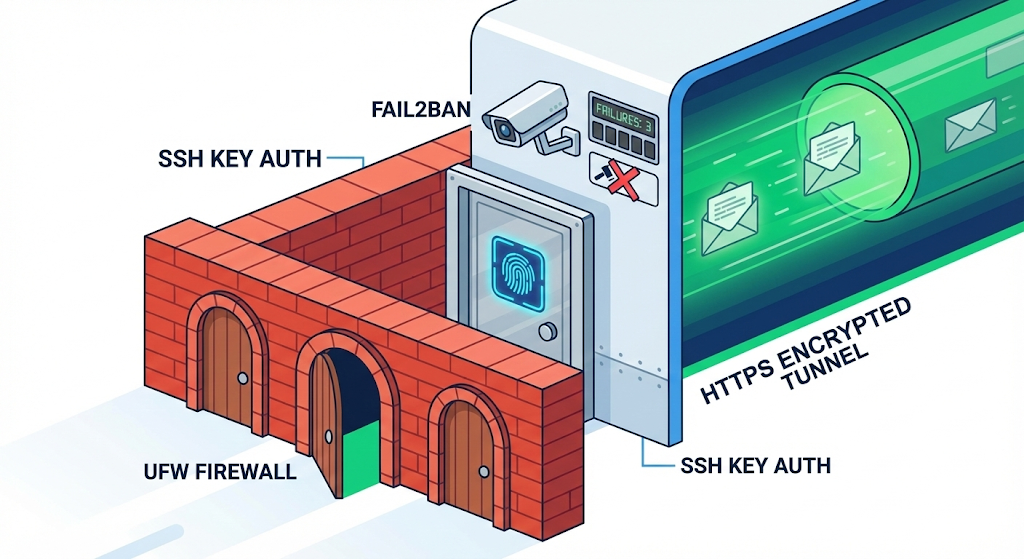
Step 1: Lock the Front Door — Harden SSH
The server’s front door is SSH (Secure Shell). The very thing I use to connect to the server. The problem is that hackers try to come in through the same door. The first thing to do is reinforce this front door.
Change the SSH Port (default 22 → something else)
The default SSH port is 22. A hacker’s automated scanner will knock on port 22 first. Just changing the port number can filter out more than 90% of indiscriminate attacks.
# Open the SSH configuration file
$ sudo vi /etc/ssh/sshd_config

# Change the port number (default 22 → e.g. 2222)
Port 2222

# Restart the SSH service
$ sudo systemctl restart sshd
To use an analogy: a thief usually targets the main entrance on the 1st floor (port 22). If you move the entrance to a rooftop door on the 3rd floor (port 2222), most thieves won’t even find where the door is.
Block Direct Root Login
Looking at the logs, the first account hackers try is ‘root’. root is Linux’s supreme admin account, so if they crack it, they can take over the entire server.
# Block direct root login in the SSH config file
$ sudo vi /etc/ssh/sshd_config

PermitRootLogin no
Now SSH access as root itself is impossible. Log in with a regular account, and when needed, elevate privileges with sudo.
SSH Key Authentication Instead of Passwords
No matter how complex a password is, an automated program trying tens of thousands of combinations will eventually get through. The surest method is to turn off password login entirely and connect only with an ‘SSH Key’.
# Generate an SSH key pair on your local machine
$ ssh-keygen -t rsa -b 4096

# Copy the public key to the server
$ ssh-copy-id -p 2222 user@my-server-ip

# Disable password login on the server
$ sudo vi /etc/ssh/sshd_config
PasswordAuthentication no
SSH key authentication is not a ‘key’ — it’s ‘fingerprint recognition’. A password (key) can be copied, but the private key (fingerprint) that exists only on my machine is practically impossible to duplicate.
Step 2: Build a Fence — The Firewall
Now that you’ve reinforced the front door (SSH), it’s time to build a fence around the building and control access. This is the ‘Firewall’.
A server has a total of 65,535 ports (doorways). Without a firewall, all 60,000+ doors are wide open. You need to open only the doors you need and lock all the rest.
The easiest firewall tool on Linux is ‘UFW (Uncomplicated Firewall)’.
# Enable UFW
$ sudo ufw enable

# Default policy: block all incoming, allow all outgoing
$ sudo ufw default deny incoming
$ sudo ufw default allow outgoing

# Open only the required ports
$ sudo ufw allow 2222/tcp   # SSH (the changed port)
$ sudo ufw allow 80/tcp     # HTTP
$ sudo ufw allow 443/tcp    # HTTPS

# Check the current firewall status
$ sudo ufw status
| Port | Purpose | Open? |
|---|---|---|
| 2222 | SSH (changed port) | ✅ Allow |
| 80 | HTTP (web) | ✅ Allow |
| 443 | HTTPS (secure web) | ✅ Allow |
| 22 | SSH (default, no longer used) | ❌ Block |
| Others | All | ❌ Block |
Out of 60,000+ doors, I left only 3 open and bricked up the rest. The door the thief wants to knock on simply doesn’t exist anymore.

Step 3: Encrypt Communication — HTTPS
If your server provides a web service, you also need to protect communication between the user and the server. That’s ‘HTTPS’.
HTTP sends data like a ‘postcard’ — anyone in between can read it. HTTPS puts the data in a ‘sealed envelope’. Even if someone intercepts it, they can’t read the contents.
What if a user’s username/password submitted on a login form is transmitted over HTTP? Someone sharing the café Wi-Fi can see that content word for word.
In practice, the easiest way to enable HTTPS is to get a free SSL certificate from ‘Let’s Encrypt’.
# Install Certbot (Let's Encrypt automation tool)
$ sudo apt install certbot python3-certbot-nginx

# Issue the certificate and apply it to Nginx automatically
$ sudo certbot --nginx -d mydomain.com

# Test auto-renewal (certificates must be renewed every 90 days)
$ sudo certbot renew --dry-run
With just a few commands, my service’s address changes from http:// to https://, and a padlock icon appears in the browser’s address bar. It tells users, “This site is safe.”
Step 4: Automated Defense System — Fail2Ban
Even after changing the SSH port and setting up key authentication, persistent bots still exist in the world. There will always be some that discover the changed port and attempt to connect.
This is where ‘Fail2Ban’ comes in. It’s a tool that automatically blocks IPs that fail login a certain number of times.
# Install Fail2Ban
$ sudo apt install fail2ban

# Configure SSH protection
$ sudo vi /etc/fail2ban/jail.local
[sshd]
enabled = true
port = 2222
maxretry = 5
bantime = 3600
findtime = 600
| Setting | Meaning |
|---|---|
| maxretry = 5 | After 5 wrong attempts |
| bantime = 3600 | Block that IP for 1 hour |
| findtime = 600 | Triggered if 5 failures happen within 10 minutes |
# Start Fail2Ban
$ sudo systemctl enable fail2ban
$ sudo systemctl start fail2ban

# Check currently banned IPs
$ sudo fail2ban-client status sshd
Fail2Ban is the ‘CCTV + automatic lock’ standing in front of your front door. If a suspicious person gets the password wrong too many times, it automatically bans them.
Practical Advice: The Security Checklist
I’ve organized everything configured so far into a checklist. Every time you set up a new server, follow this list and you’ll have a basic line of defense.
| # | Item | Command/Setting |
|---|---|---|
| 1 | Change SSH port | Port 2222 in sshd_config |
| 2 | Block root login | PermitRootLogin no |
| 3 | Switch to SSH key auth | PasswordAuthentication no |
| 4 | Enable firewall | ufw enable, allow only required ports |
| 5 | Apply HTTPS | Let’s Encrypt + Certbot |
| 6 | Install Fail2Ban | Auto-block IPs on login failures |
| 7 | Regular updates | sudo apt update && sudo apt upgrade |
Number 7 is surprisingly important. Security vulnerabilities are discovered daily. No matter how strong your firewall is, it’s useless if the OS or software itself has holes. Regular updates are the most basic yet most effective security measure.
Wrapping Up: Security Isn’t Something Special — It’s a Habit
At first, the word ‘security’ felt grandiose. Hacking defense, intrusion detection, encryption… I thought it was the stuff of movies.
But when I actually tried it, it didn’t require any amazing skills. Change the SSH port, turn on the firewall, set up key auth, install Fail2Ban. It was a few lines of commands. What mattered wasn’t ‘knowing’ but ‘doing’.
Security incidents don’t happen because of highly advanced hacking — they happen on servers that never took basic measures.
Since that day, every time I set up a new server, I run this security checklist before pushing any code. Checking the locks before opening the door. That’s the most basic attitude for protecting a server.
So far, we’ve built the basic stamina (CLI, permissions, security) to survive in the wilderness of Linux. But a fundamental problem remains: the environment on my laptop (Windows) is different from the Linux server. The Java version is different, the libraries are different.
There’s a technology that will end the “but it works on my machine?” excuse forever. Next time, let’s look at ‘virtualization and containers’ — a way to eliminate environmental differences altogether.