“I pushed the instructions, so why is nothing happening?”
Last time, I ambitiously wrote a .gitlab-ci.yml file and ran push. “Now deployment will happen automatically, right?” Full of expectation, I clicked GitLab’s ‘CI/CD > Pipelines’ menu.
But what appeared on the screen wasn’t a green success indicator — it was an endlessly spinning loading bar and a status message saying ‘Pending’. When I clicked the message, this warning popped up.
This job is stuck because the project doesn't have any runners online assigned to it.
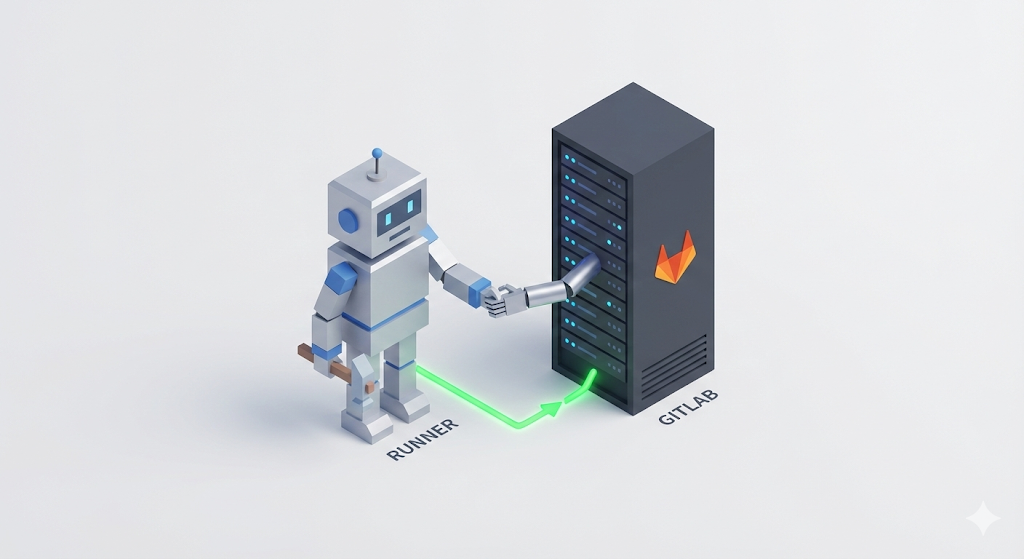
Translated: “A job came in, but the worker (Runner) who’s supposed to handle it didn’t show up for work.” Oops — I had thrown the work order at the factory manager (GitLab Server), but I never actually hired any factory employees (Runners).

GitLab Runner: The Hands and Feet of the Pipeline
GitLab is broadly divided into two components.
- GitLab Server (Headquarters/Factory Manager): Stores the code, manages the pipeline status, and gives the orders.
- GitLab Runner (Branch Office/Field Worker): Installed on the actual server, it takes orders from headquarters, fetches the code, builds it, and carries out the deployment commands.
“Can’t GitLab just connect to my server on its own and deploy?” If you think about it, that’s incredibly dangerous. If a website on the internet (GitLab) could enter the computer (server) in my room and run commands at will just because someone clicked a button, that’s basically ‘hacking’. If someone breached my GitLab account, they could turn my server into a Bitcoin miner.
That’s why GitLab doesn’t connect to my server directly. Instead, it plants a ‘verified agent (Runner)’ that operates only inside my server, and gives orders only through that agent. The complex installation and registration process we’re about to do is the ‘security procedure’ that authenticates this agent.
Step 1: Check the Job Posting (Issuing the Token)
Before installing the Runner, we first need to post a ‘job opening’ at headquarters (GitLab) saying “our project needs a worker” and receive a ‘registration card (Token)’.
In the latest GitLab versions, the way to find the token is a bit hidden for security reasons.
- Go to your GitLab project
- Left menu: Settings > CI/CD
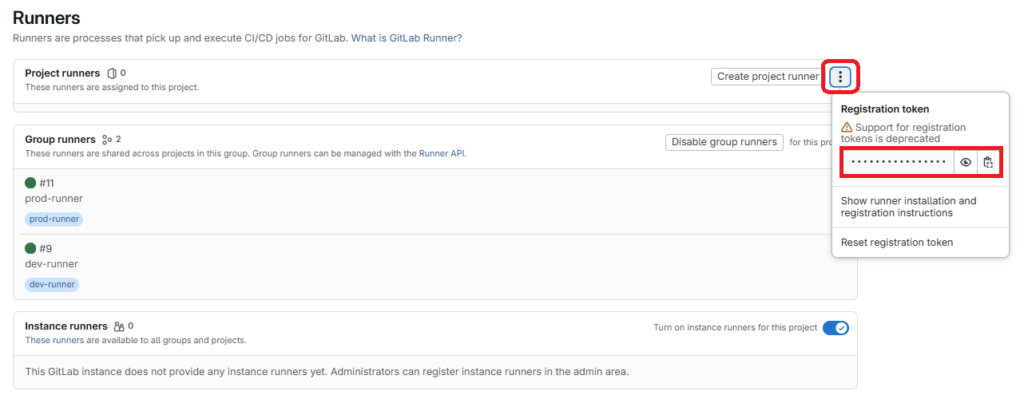
- In the Runners section, click
Expand - In the top right corner of the Project runners section, click the three-dot button (⋮)
When you click this button, a popup menu appears, and the information we need is right there. Note and copy the URL and the Registration token.
(Note: You may see a scary-looking warning that says ‘Support for registration tokens is deprecated’. It means this method will eventually go away, but for now it’s still supported for compatibility — so don’t panic, just copy the token.)
[Tip] Multiple projects? (Group Runner) If you, like me, manage multiple projects (frontend, backend, etc.) under a single group, registering a runner for each project one by one is inefficient. In that case, register the runner from Group Settings > CI/CD instead of project settings. A ‘Group Runner’ created this way can handle all the jobs from every project in that group on its own. (I have many projects, so I went with this approach.)
Step 2: Hire the Worker (Installing the Runner)
Now let’s actually install the runner on a Linux server (or your PC). The cleanest way is, of course, to use our beloved ‘Docker’.
# 1. Run the GitLab Runner container
docker run -d --name gitlab-runner --restart always \
  -v /var/run/docker.sock:/var/run/docker.sock \
  -v gitlab-runner-config:/etc/gitlab-runner \
  gitlab/gitlab-runner:latest
-v /var/run/docker.sock:/var/run/docker.sock: This is the important part. The runner has to spin up yet another Docker container (for the build), so we share the host’s Docker socket with it. (The Docker-in-Docker approach)
Step 3: Sign the Employment Contract (Registering the Runner)
Installing the runner isn’t the end. The runner needs to register with the GitLab server, saying “I’m a worker for project A.”
Let’s go inside the runner container we just launched and run the registration command.
# Run the registration command inside the runner container
docker exec -it gitlab-runner gitlab-runner register
Now a series of twenty-questions-style prompts begins in the terminal. Just enter the information you saw in Step 1.
- Enter the GitLab instance URL:
https://gitlab.com/(or your self-hosted GitLab address)
- Enter the registration token:
- (Paste the token you copied earlier)
- Enter a description for the runner:
my-runner-01(anything works, just pick a name that’s easy to recognize)
- Enter tags for the runner:
- (You can skip this by pressing Enter. It’s used when you only want the runner to take jobs with specific tags.)
- Enter an executor:
docker(We’re going to build on top of Docker, so enter docker.)
- Enter the default Docker image:
docker:latest(the image to use by default)
“Runner registered successfully.” Once you see this message, hiring is complete! Now refresh the GitLab screen, and you’ll see a runner with a green light, shouting “Ready (Online)”.
Step 4: Fire Up the Pipeline!
The moment the runner is registered, the previously stuck (Pending) pipeline starts moving on its own. Running… and a moment later, Passed!
I didn’t do anything, but the machine ran the tests on its own, did the build, created the image, and pushed it to the registry. When I opened the terminal to check the logs, every step had finished much faster and more accurately than when I did it manually.
“Whoa… it actually works?”
What used to be a 10-minute manual deployment is now done with a single git push. I can now kick off a deployment and go grab a coffee.
Practical Tip: Docker Permission Issue (Permission Denied)
There’s an error you’ll hit with 99% probability when first setting up a runner. dial unix /var/run/docker.sock: connect: permission denied
The runner is trying to use Docker commands but doesn’t have permission. In that case, open the gitlab-runner config file (config.toml) and turn on the privileged = true option.
# /etc/gitlab-runner/config.toml (runner config file)
[[runners]]
  name = "my-runner-01"
  executor = "docker"
[runners.docker]
privileged = true # Switch this to true so Docker-in-Docker works properly. # …
Wrapping Up: Now I Can Clock Out
I finally have my very own ‘deployment robot’. Now I can focus solely on writing code. The boring, repetitive verification and deployment work will be handled by my faithful robot (Runner).
But there’s still 2% missing. Right now, the pipeline runs unconditionally every time something is pushed to the master branch. “What if I want to deploy to the dev server (dev) automatically, but only deploy to production (prod) when I press an ‘approval button’?”
Next time, let’s look at smarter pipeline control with ‘per-branch deployment strategies’ and ‘manual approval procedures’.